By Dr Sarah Lantz
Recipe from Forage, Ferment, Feast by Sarah Lantz & Weier Higgs
“It looks scary,” said my friend Pete when I opened a bottle of homemade mead and poured him a glass. His frown was soon replaced with a thrilled smile. Mead is essentially honey wine. Aristotle speaks of it. Shakespeare mentions it. Beowulf drank it. And as I watch a TV series about vikings in the evenings, I’m certain they’re drinking this ancient golden-hued brew out of those sheep-horn mugs. I’m still scouring the internet for those mugs.
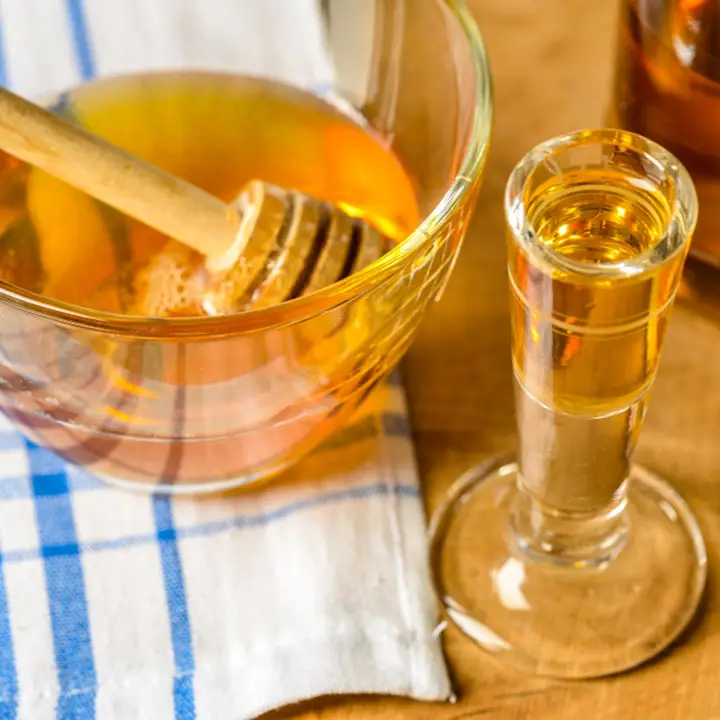
Mead is generally made with two simple ingredients: raw honey and water. This is considered a wild mead as it’s fermented utilising the wild yeasts naturally occurring in the honey. When the conditions are right, this wild method can produce a beautifully rich mead. The results from relying on wild yeasts can however be unpredictable, and your ferment may turn into a super-charged honey-vinegar-shrub-type-thing instead. Still good, but not what was initially intended, I’m sure. Adding a packet of cuvee or champagne yeast can make the process a little more predictable. In either scenario however, patience and perseverance are everything in making a good mead.
If you want something more elaborate, you can flavour mead with fruit, citrus peels, spices, herbs and berries. All work wonderfully. The naturally occurring yeasts in the fruit, like those in the raw honey, fuel the fermentation, transforming glucose (and eventually fructose if you age your mead) into alcohol. You do have to strain the fruit out before the fermentation has stopped. Remember though, the hero of mead is the honey, and a single honeybee produces a meagre twelfth of a teaspoon of honey per day, and because most meads require loads of the sweet stuff, each drop is precious. The honey used determines the overarching flavour of the mead, and can vary according to a honey bee’s particular diet of nectar and pollen. For this reason, it’s worth trying a few different local varieties of honey.
This recipe makes a 1 litre brew, so increase your recipe depending on the volume of your ferment vessels.
Ingredients
- 1 cup raw honey
- 4 cups un-chlorinated water (as a standard rule, the recipe for mead is one-part honey to four parts water 1:4)
- Optional: A packet of cuvee yeast or champagne yeast.
Method:
- Combine honey and water (and optional yeast) together in a large glass jar. Whatever amount you add, always use good-quality raw honey. Pasteurisation kills the naturally occurring yeasts present in raw honey. If you use pasteurised honey, your fermentation will not work, unless you add commercial yeast, which you can find at most good brewing stores.
- Stir vigorously or place a lid on the jar and shake it until the honey and water is well combined. You do not need to expose this mixture to the air in order to attract microbes that will ferment it. Raw honey already contains yeasts that convert the sugars to boozy goodness.
- Until your honey and water mixture begins to bubble, stir it vigorously every time you think of it. In the fermentation bible The Art of Fermentation, Sandor Katz suggests stirring the mead to create a vortex in one direction, then in the other. This aerates the mead-in-progress, which helps spur yeast growth. Opening the jar daily – burping it – also releases built-up carbon-dioxide and avoids any potential explosions.
- Mead usually begins to show signs of life in a day or two. Take a whiff and you’ll notice a definite smell of alcohol beginning. Stir it again and a foamy head will form. At this point, you can stir your mead just once a day.
- The mead will foam up like this for a few more days when you stir it. Once the bubbles die down, most of the glucose will have been converted into alcohol. Most of my bubbling action subsided around fourteen days but it could be sooner. You can at this point, enjoy a young, partially fermented mead, as cultures around the world have done for millennia, or you can bottle, rack, and age your mead, which will increase the alcohol content and bring a more clarified brew.
If you do decide to bottle your mead and the fermentation has not finished converting the remaining fructose to alcohol, your bottles may explode, so make sure the bubbling action of your mead has subsided before you bottle.
Racking
For larger quantities of mead, it is best to siphon it into glass bottles so it can ferment more slowly and you can keep a close eye on it. The glass container commonly used for this process is called a carboy, a large glass bottle with a with a narrow neck, usually fitted with a rubber stopper and fermentation air-lock to prevent bacteria and oxygen from entering during the fermentation process, yet gasses from the bottle can still exit.
At this point, simply siphon or pour the mead into your carboy, leaving behind the yeasty bottom of your ferment as much as possible (the spent yeast will sit at the bottom of your vessel and is visible to the naked eye). It’s preferable to fill your carboy up to the very top, as minimising headspace reduces chances of oxidation; however, you can top up with chilled water if there is just a small gap remaining. Place an airlock and set the carboy in a cool and dry location.
This racking process simply assists the yeast to finish up fermentation, greatly reducing, and removing, the amount of yeast that remains viable. Racking also clarifies and stabilises the mead. You can rack a number of times if needed. The goal is to have a stable product that will not continue to ferment, go cloudy or sour. You will be able to watch the fermentation and clarification process as the liquid develops over time, turning from a cloudy honey colour into a clear honey wine. Cold temperatures will accelerate this process, as will sifting and removing the yeast if you so desire.
This is now a waiting game, which could take anywhere from several weeks to several months. Only you can determine when your mead is ready to bottle. The clarity of your mead, the lack of sedimentation, and the taste are all indicators that your mead is ready.
Bottling and Flavouring your mead
Many mead brewers I know adjust or blend the mead before decanting into smaller bottles ready to drink. This process can be where the skill of the mead maker shines. Since honey is the shining star of traditional meads, your strategy should be to make that honey character pleasing, with a good mouthfeel and finish. In this case, it may be that more honey is added, but always make sure your mead is stable or you risk fermentation restarting again.
Spices or fruit additions can also be leveraged to emphasise desired colours or flavours of your mead. Try these flavourings: orange and spice blends, blackberries, raisins, cloves, cinnamon sticks, nutmeg, allspice, elderberry, cherry, vanilla bean and chamomile, peppercorns, maple syrup, ginger, nutmeg, rose petals, citrus peels, hops. These can be included during the fermentation process or at the end of your brew for flavouring additions.
Article by:
Dr Sarah Lantz (PhD)
Buchi Brew Co. & Sacred Women’s Way
Want more recipes like this? Sign up to Bud Organic Club for free here and get them delivered straight to your inbox!